
Overview
In this article, we will discuss an overview of quantum computing, terminology, and working with Qiskit (open source SDK for quantum computing) and visualizing the result using the Azure Quantum workspace.
Prerequisites
Following are the prerequisites to use the attached Jupyter notebook in Azure Quantum Workspace
- Azure Account with active subscription
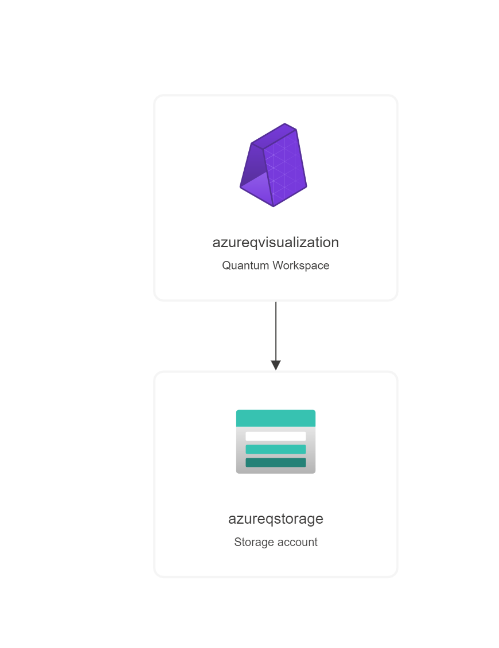
- Azure Quantum Workspace
- Azure Storage account
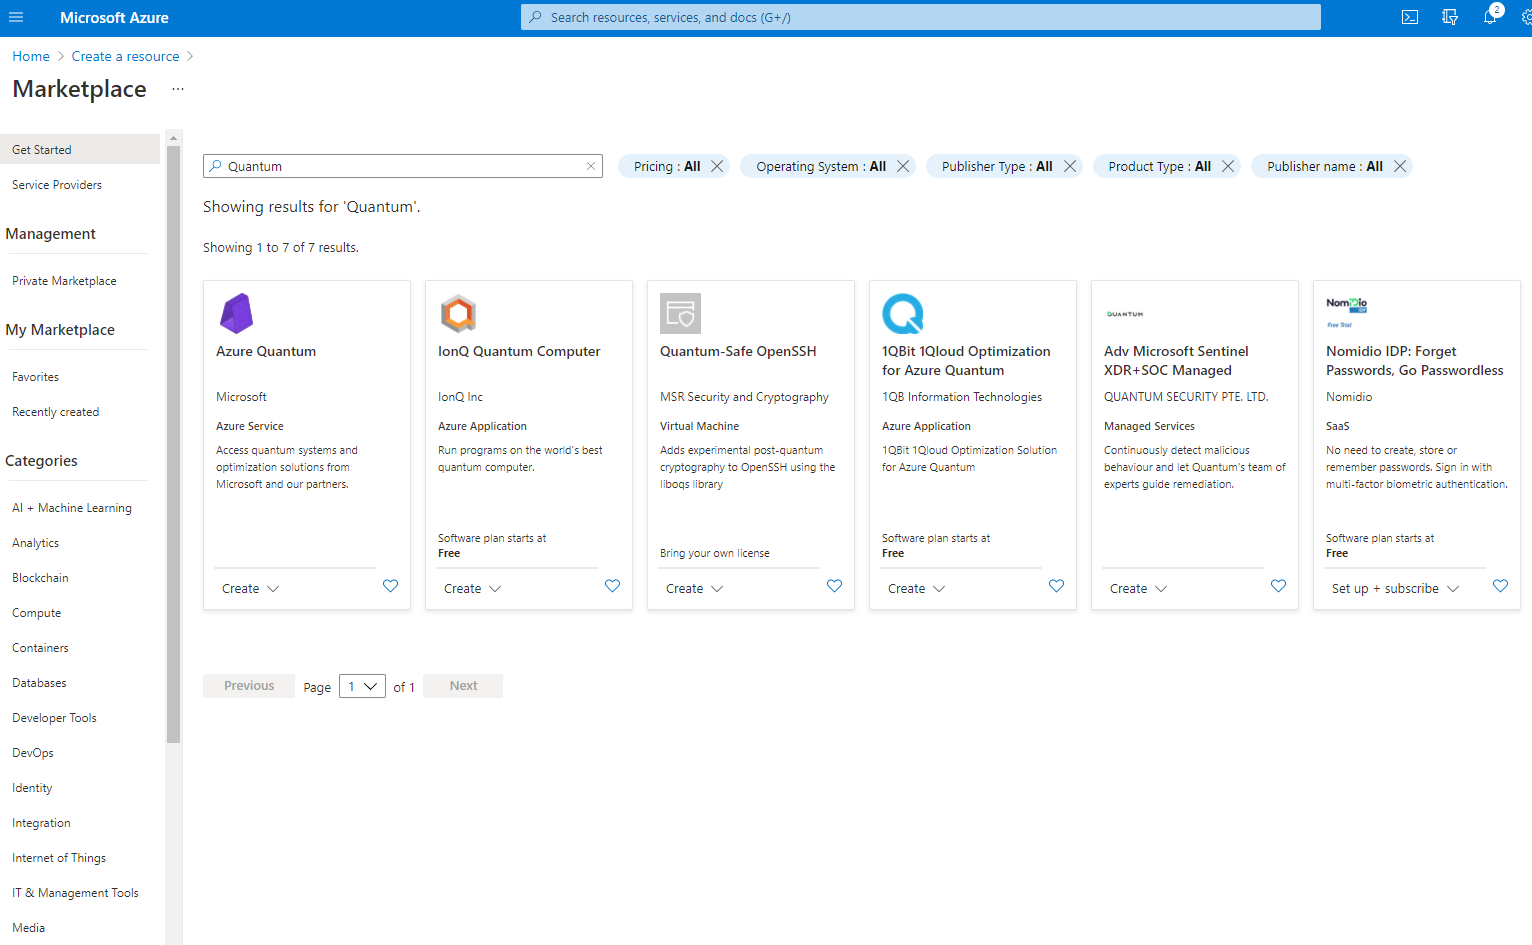
Getting started with Azure Quantum workspace
- Create Azure Quantum service
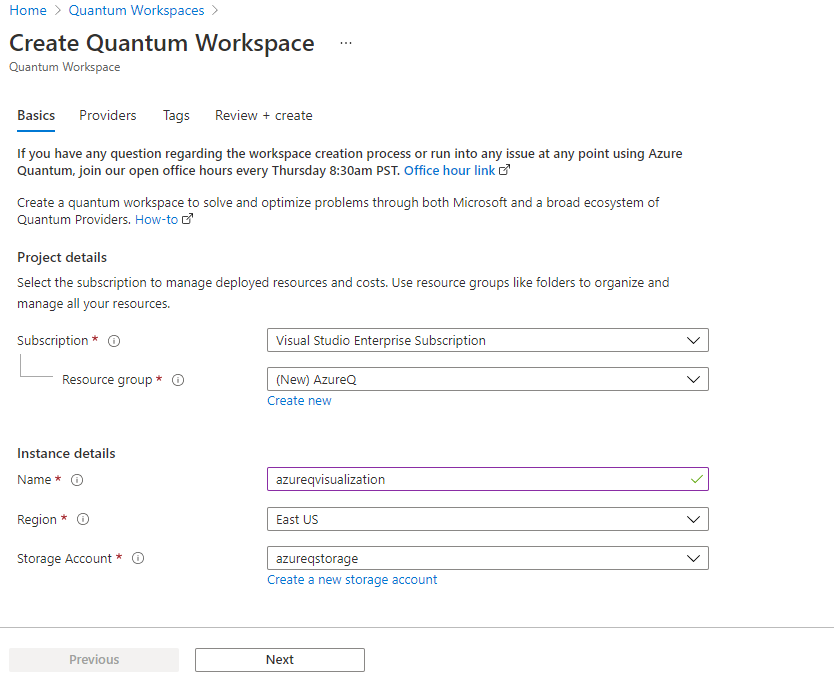
- Azure Quantum computing workspace Storage account
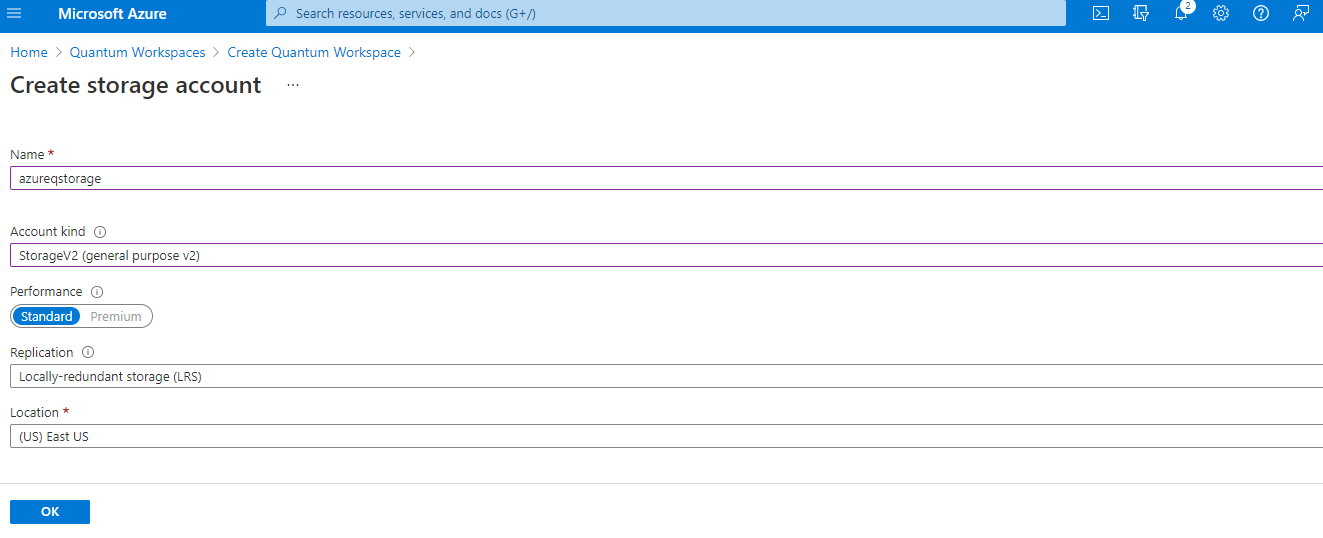
- Azure Quantum Workspace Storage account creation
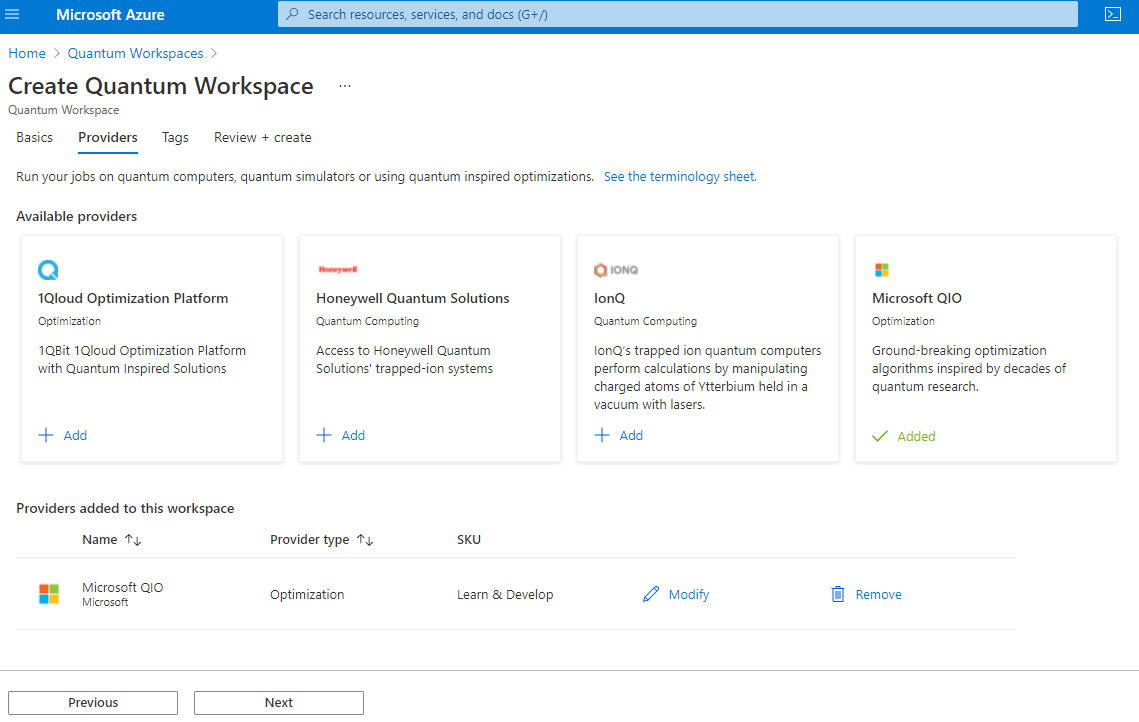
- Verify the Azure Quantum Workspace resource creation
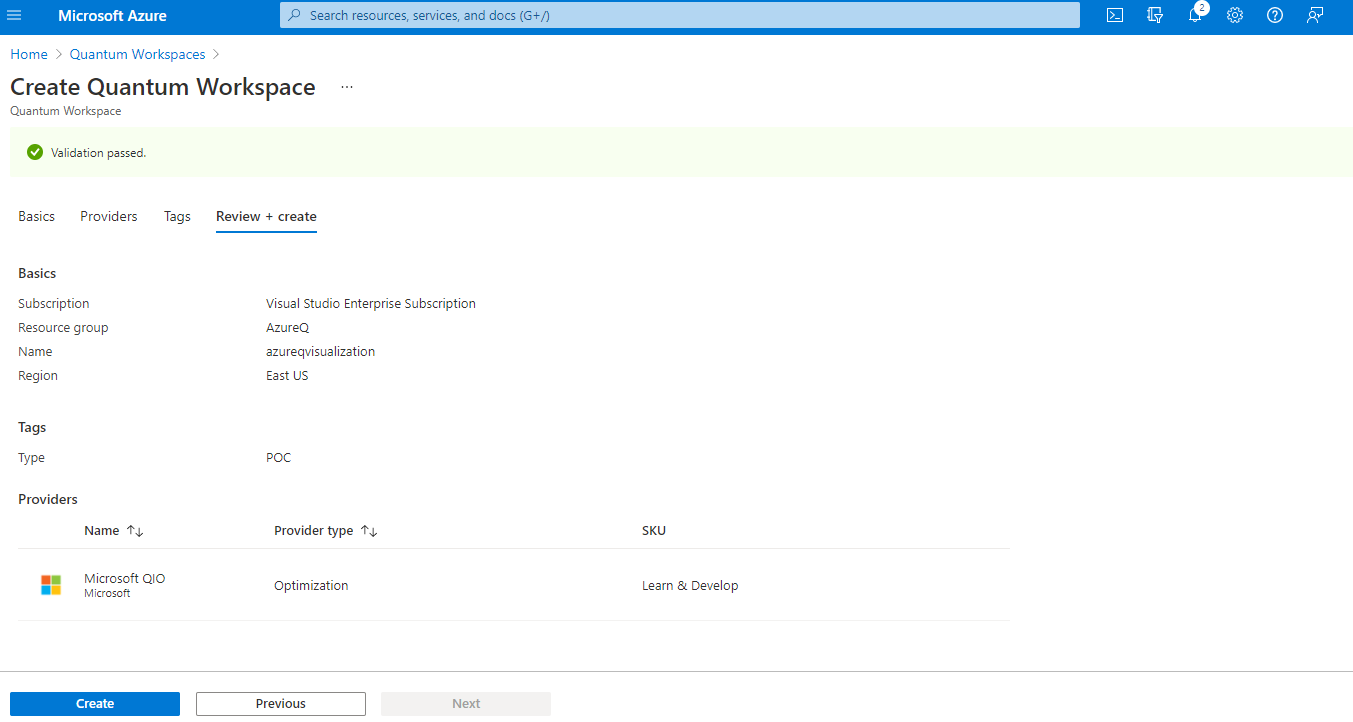
- Azure Quantum Workspace
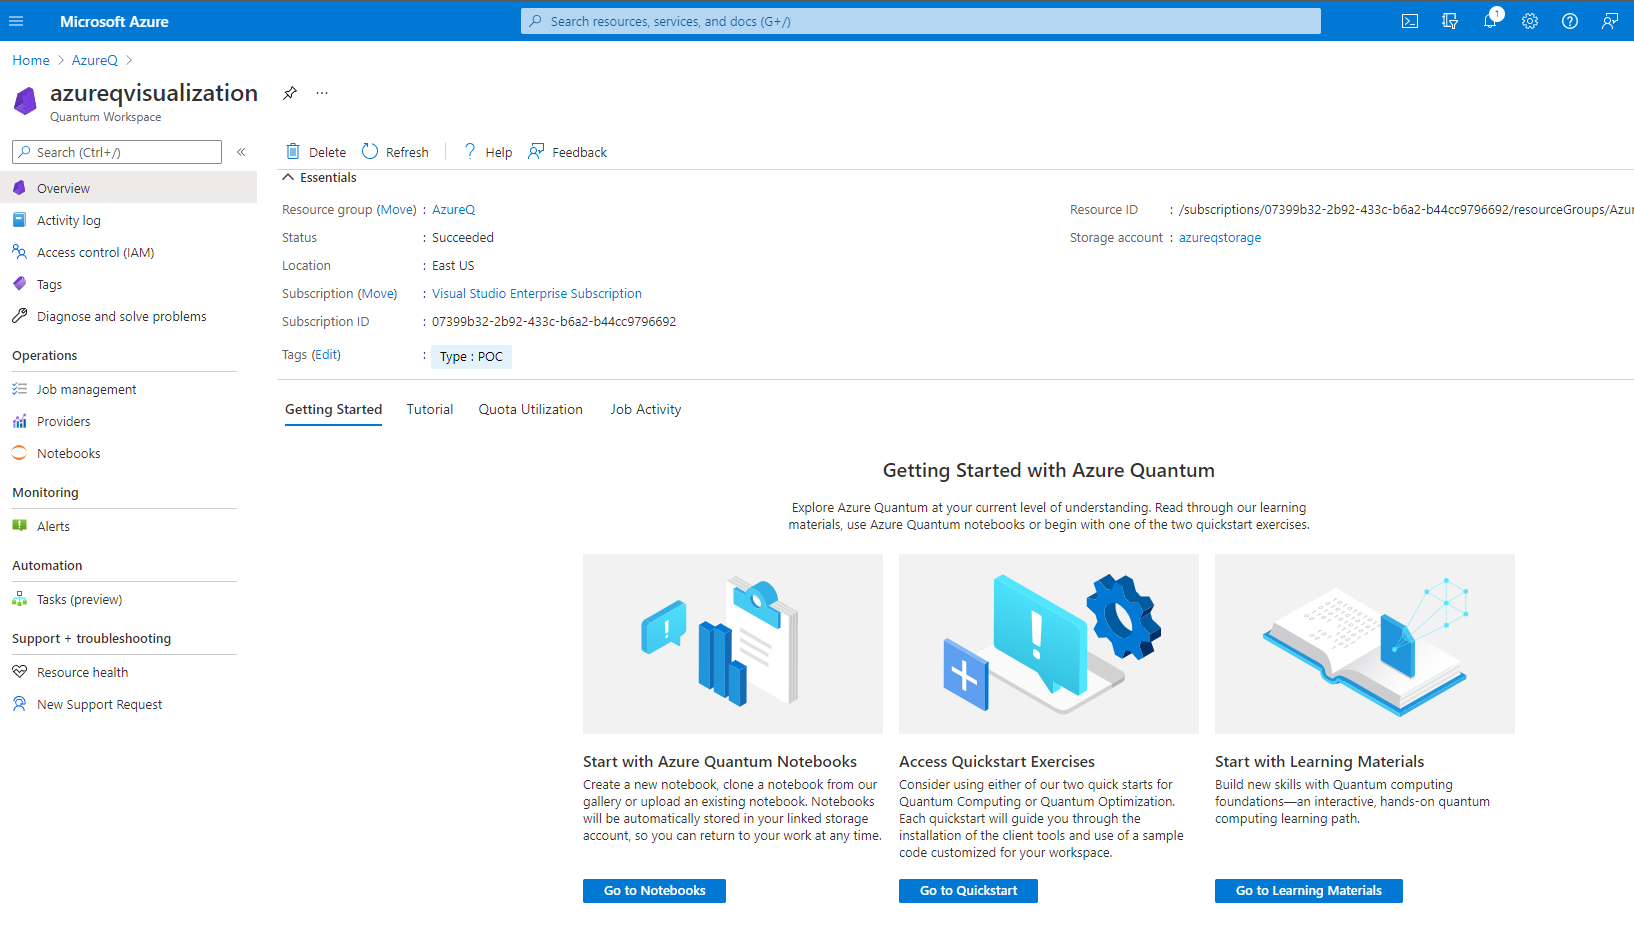
- Create a new Jupyter notebook in Azure Quantum Workspace
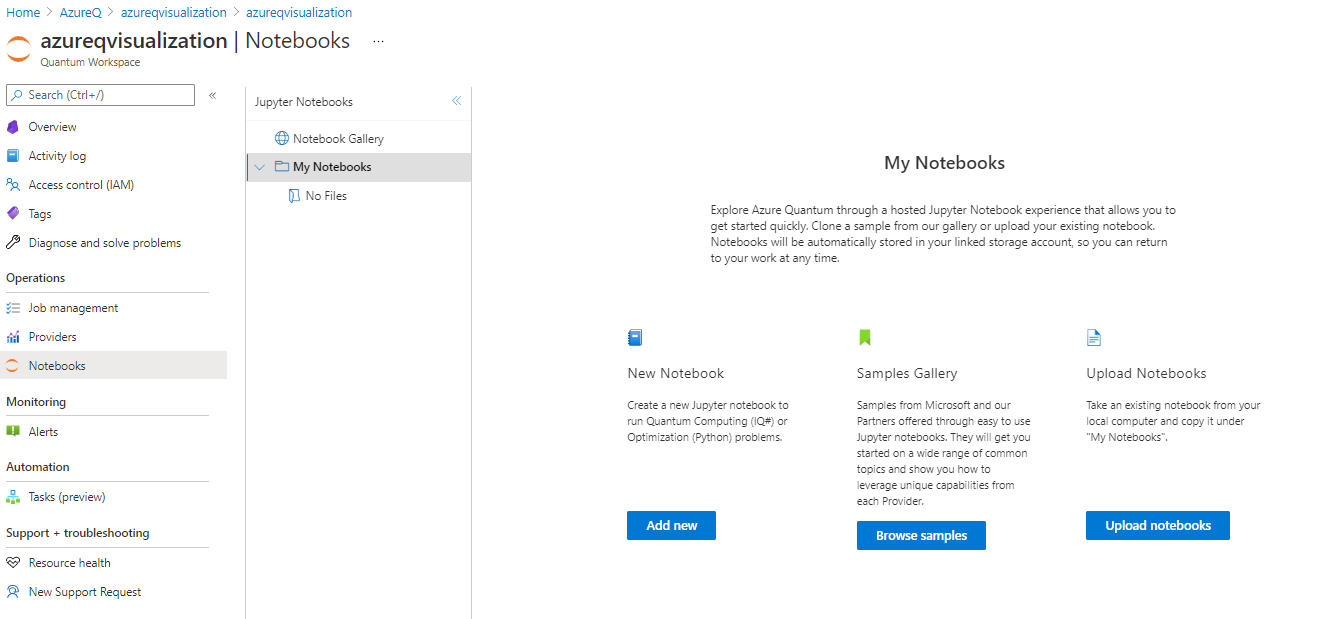
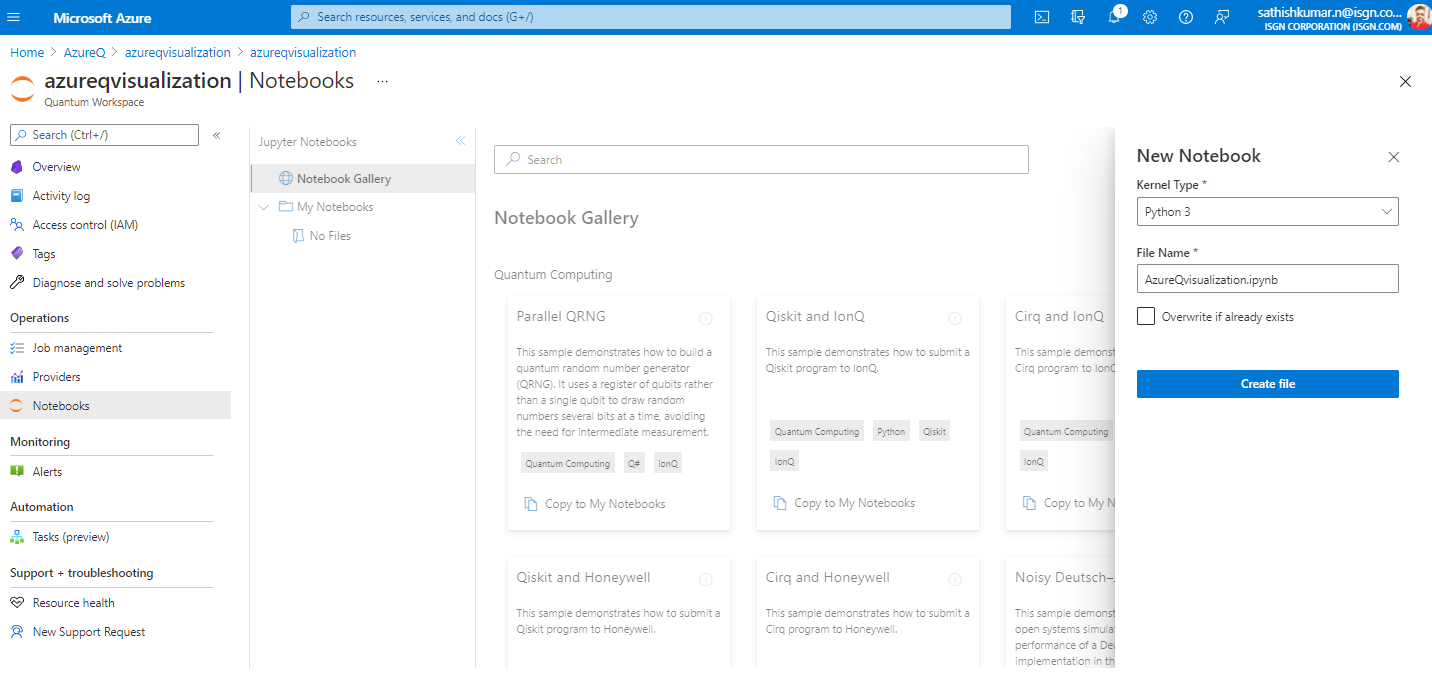
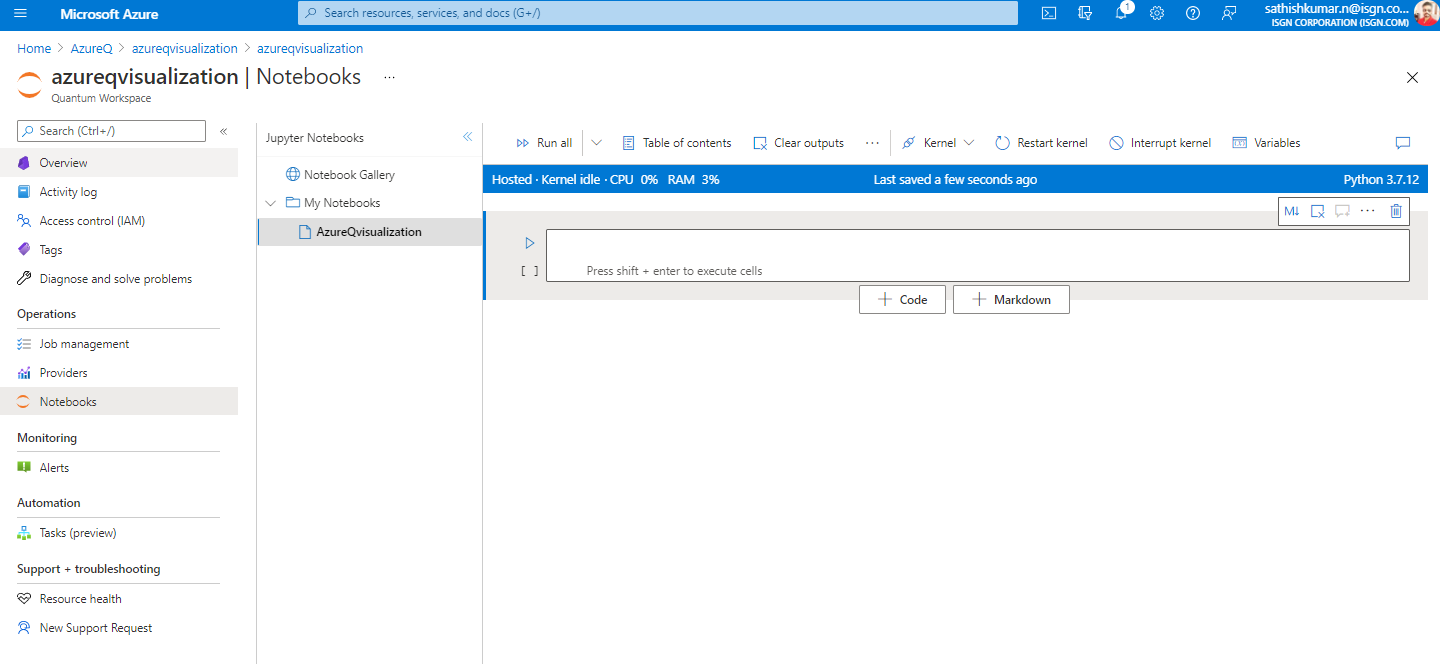
- Code with Jupyter notebook using Qiskit
Creating the Quantum circuit on Azure Quantum Service Workspace
Quantum circuits can be considered as a series of sequential computation on quantum data, processed through a sequence of quantum gates.
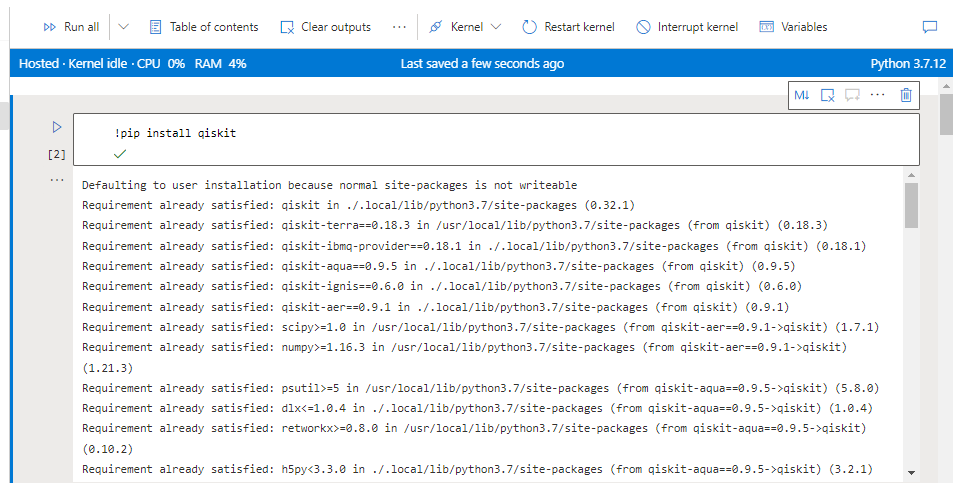
Installing the Qiskit Package:
Input:
!pip install qiskitOutput:
Importing the libraries:
Input:
import numpy as np
from qiskit import *
Building the circuit:
As we discussed, the fundamental building block of Qiskit is the quantum circuit; we can make a circuit using QuantumCircuit()
Input:
circuits = QuantumCircuit(4)Here we have created a circuit with the quantum register of 4 qubits.
After creating the circuit, we can add operations to manipulate the qubits. In the next step, we would be adding four operations on it.
Input:
circuits.h(0)
circuits.cx(0, 1)
circuits.cx(0, 2)
circuits.cx(0, 3)
Output:
<qiskit.circuit.instructionset.InstructionSet at 0x7f5dd432ded0>
In the above input on qubit 0, we have added H-gate (Hadamard gate) for superposition. To create entanglement, we apply the C-NOT (controlled-NOT) operation, that can entangle qubits (0,1), (0,2) and (0,3) under specific conditions.
Visualize the circuit:
Input:
circuits.draw()Output:
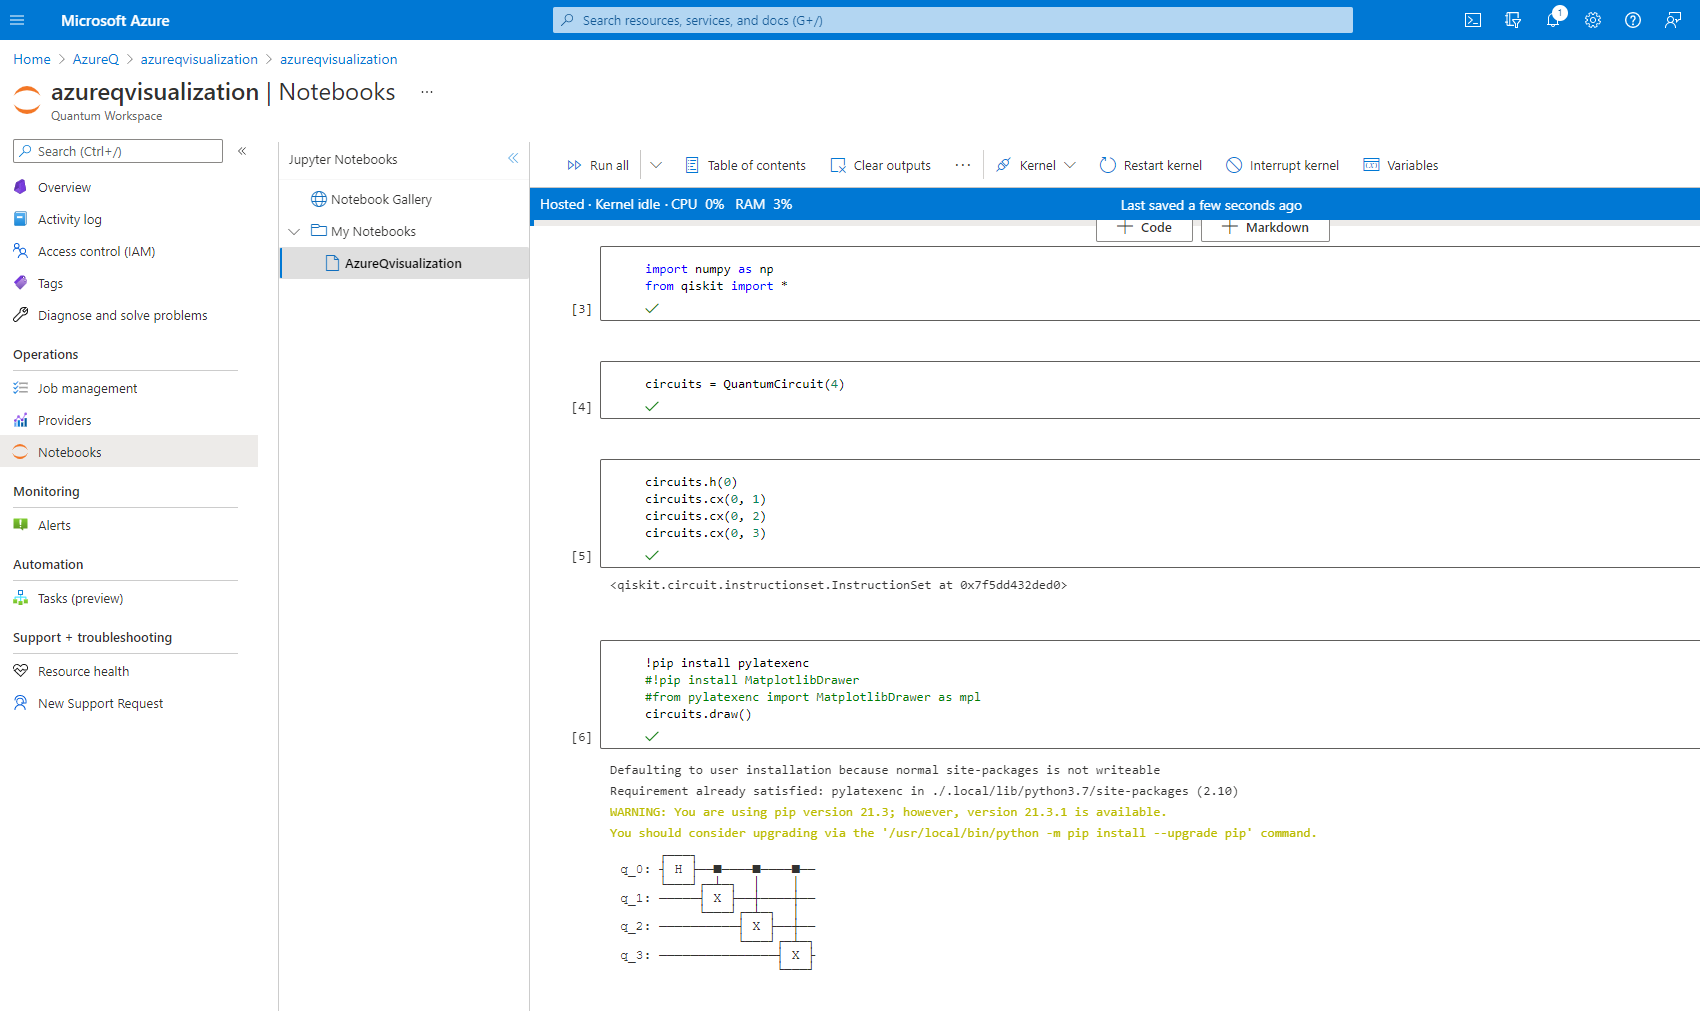
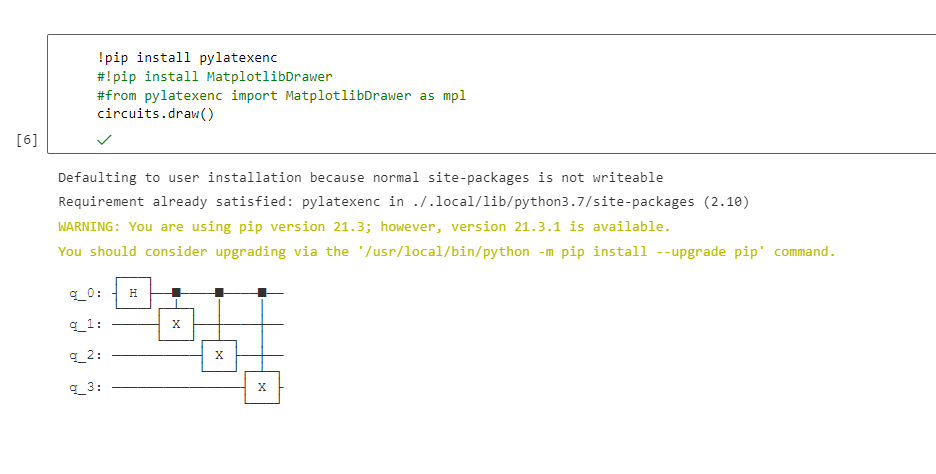
In this circuit visualization, we see that the start qubit is on the upside, and the following qubits are on the downside side of the H gate. Therefore, the flow of the circuit will be left to the right.
As discussed earlier in the article, we have built the circuit and can now execute the circuit using Qiskit modules. Qiskit’s Aer package allows for simulation of circuit using different backends.
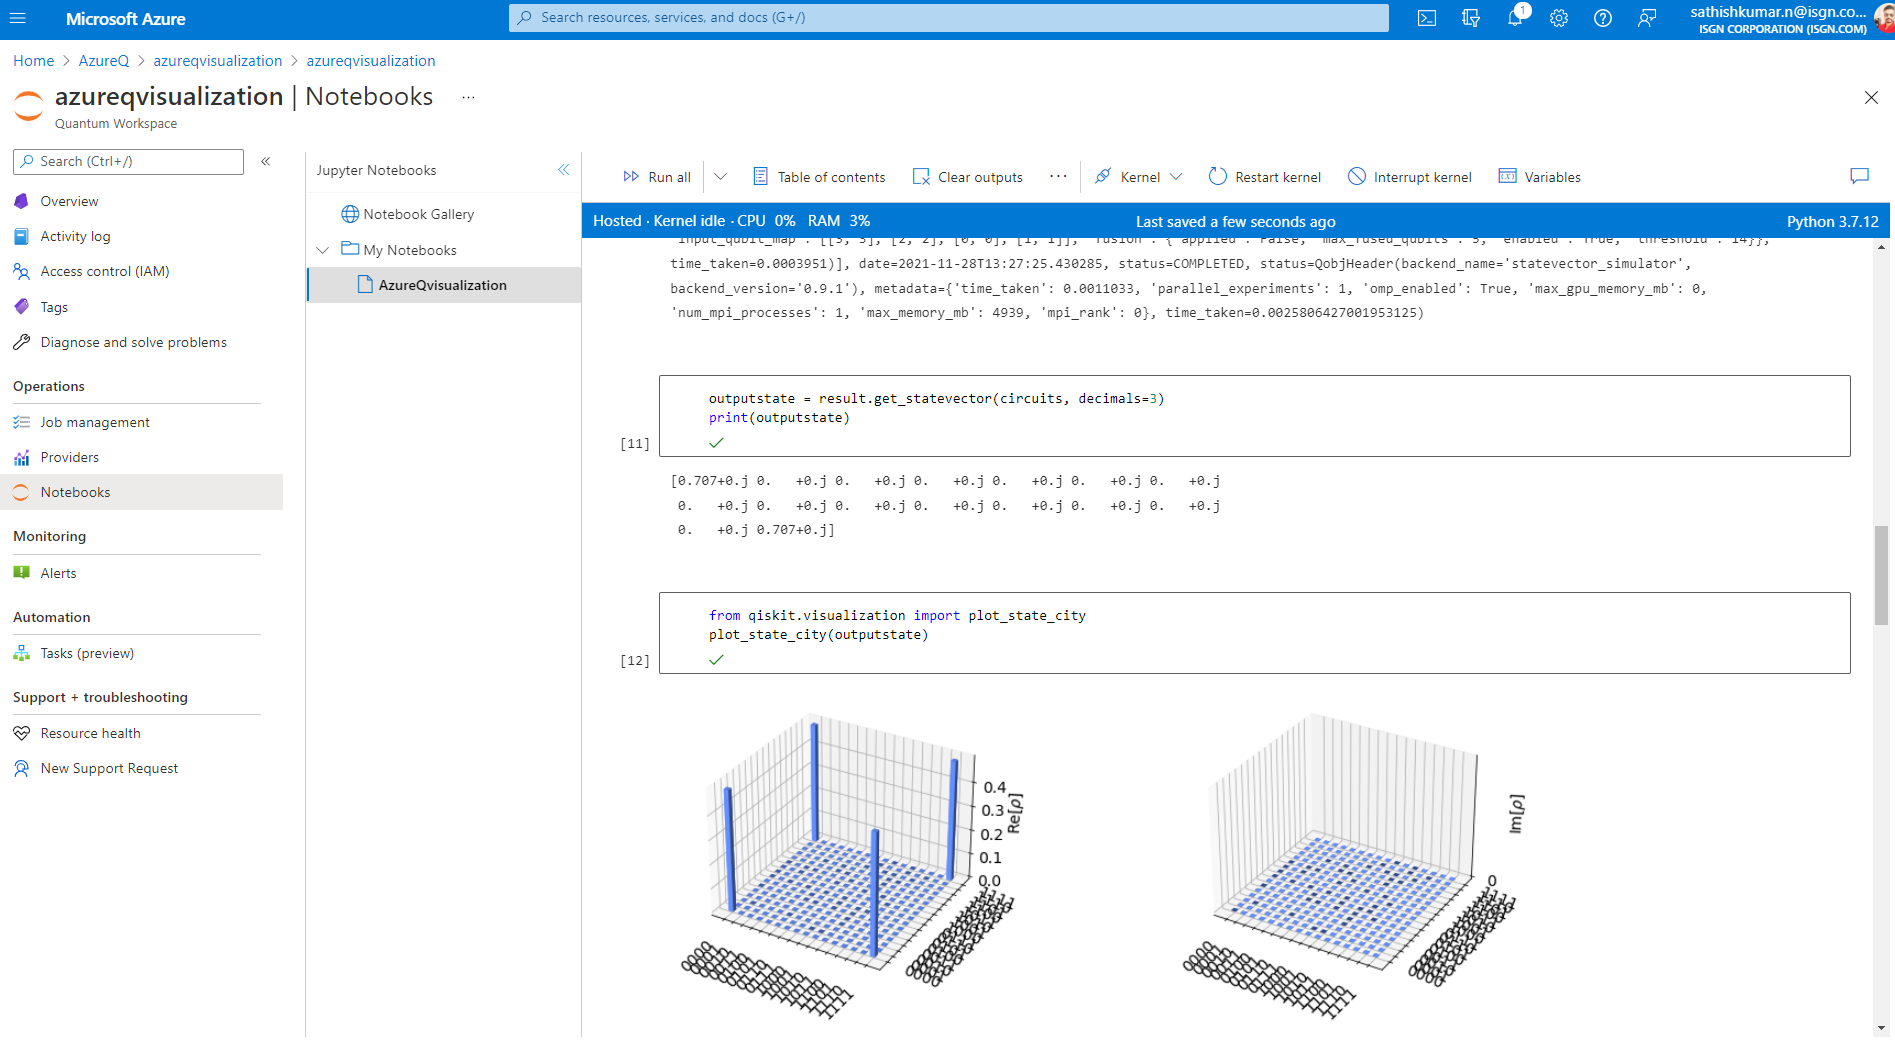
The first backend we will implement for simulation is statevector_simulator, which returns a quantum state as a complex vector of 2n dimension, where n is the number of qubits.
Importing the library:
Input:
from qiskit import Aer
Defining the job and executing it with statevector_simulator
Input:
job = execute(circuits, Aer.get_backend('statevector_simulator'))After compilation of the backend simulator, we can check for the status and results.
Input:
Job.status()Output:
<JobStatus.DONE: 'job has successfully run'>Input:
result = job.result()
print(result)
Output:

We can also visualize the state density of the circuit’s component:
Input:
from qiskit.visualization import plot_state_city
plot_state_city(outputstate)
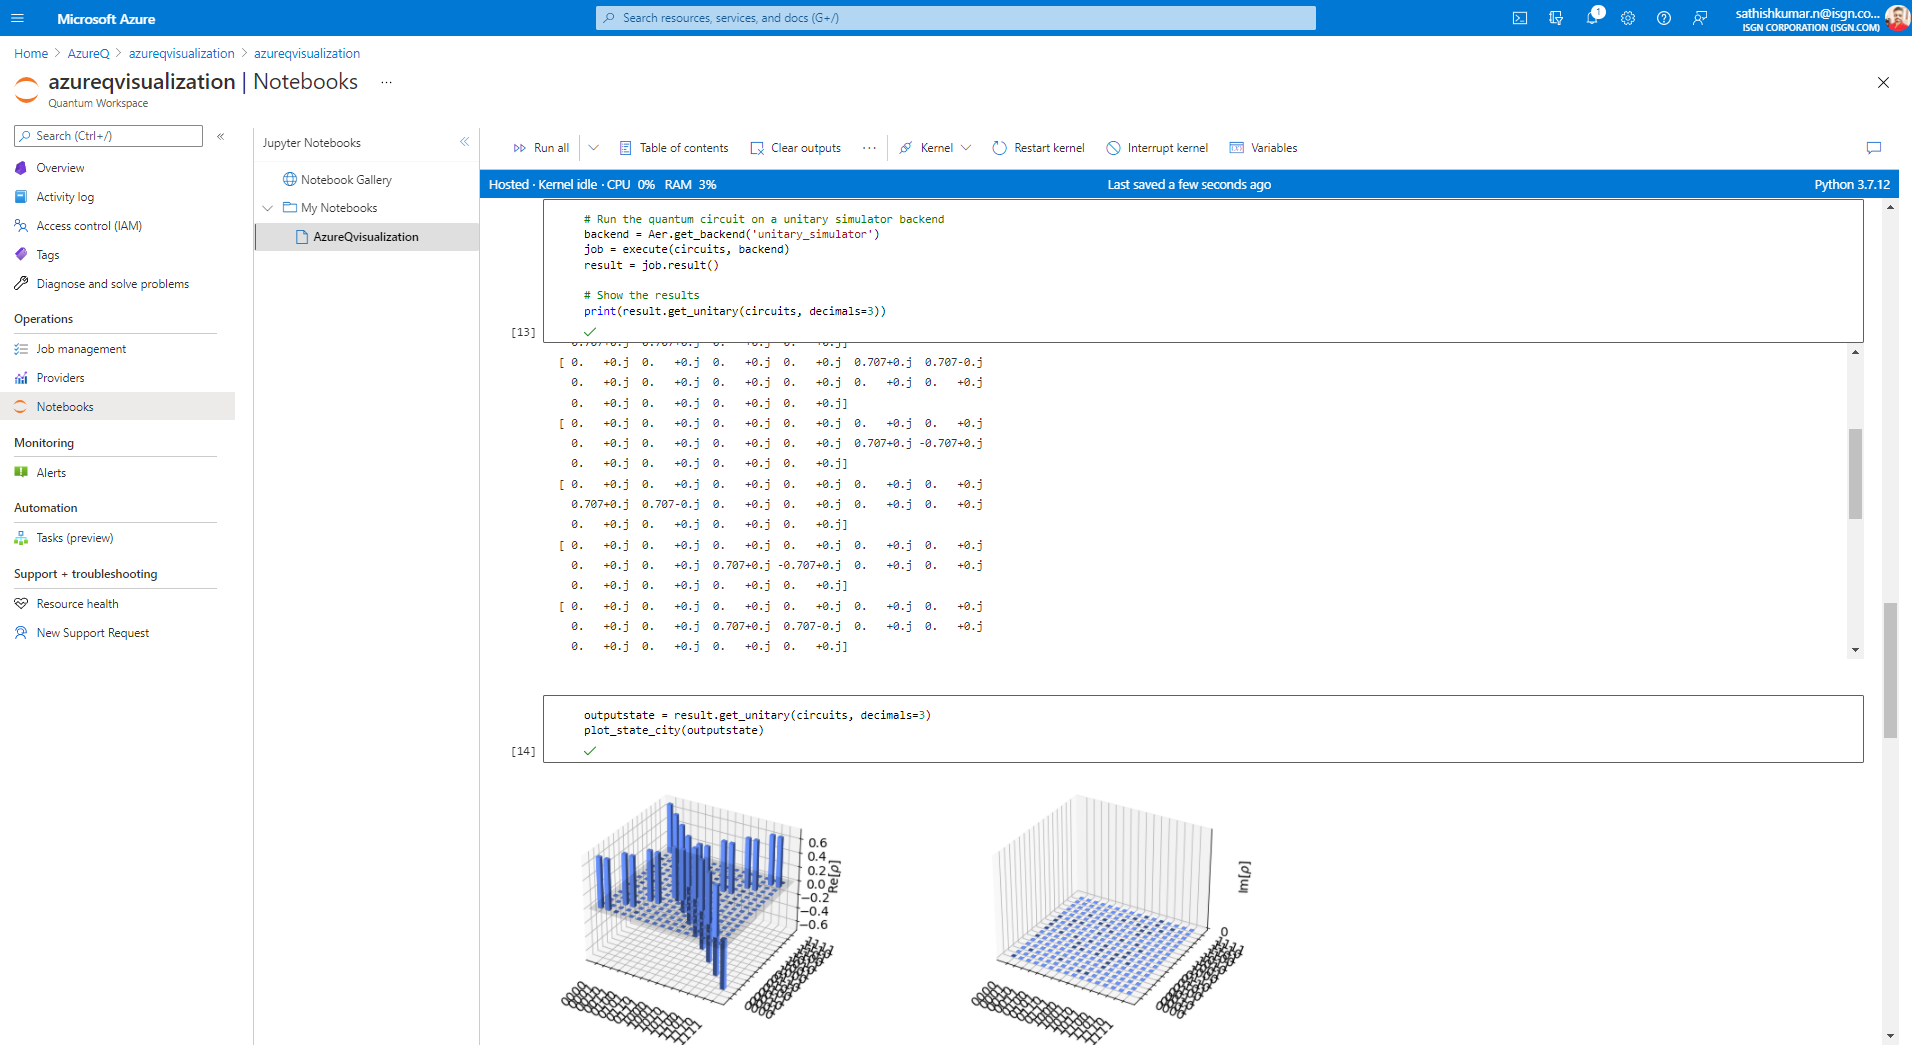
Qiskit also provides the unitary backend for simulation. This simulation results in a 2n ⨯ 2n dimensions vector.
Input:
backend = Aer.get_backend('unitary_simulator')
job = execute(circuits, backend)
result = job.result()
Check for the final solution:
Input:
print(result.get_unitary(circuits,decimals =3))
Input:
outputstate = result.get_unitary(circuits, decimals=3)
plot_state_city(outputstate)
Output :
We can also make OpenQASM backend with Qiksit. Till now, we were simulating on the ideal circuit. In real life experiments, circuits are terminated by measuring each qubit. And without measurement, we cannot gain information about the qubit state.
Including measurement simulation requires adding measurement on the circuit to use OpenQASM.
Creating the circuit:
Input:
meas = QuantumCircuit(4, 4)
meas.barrier(range(4))
meas.measure(range(4), range(4))
qc = circuits + meas
Visualizing the circuit:
Input:
Qc.draw()Output:
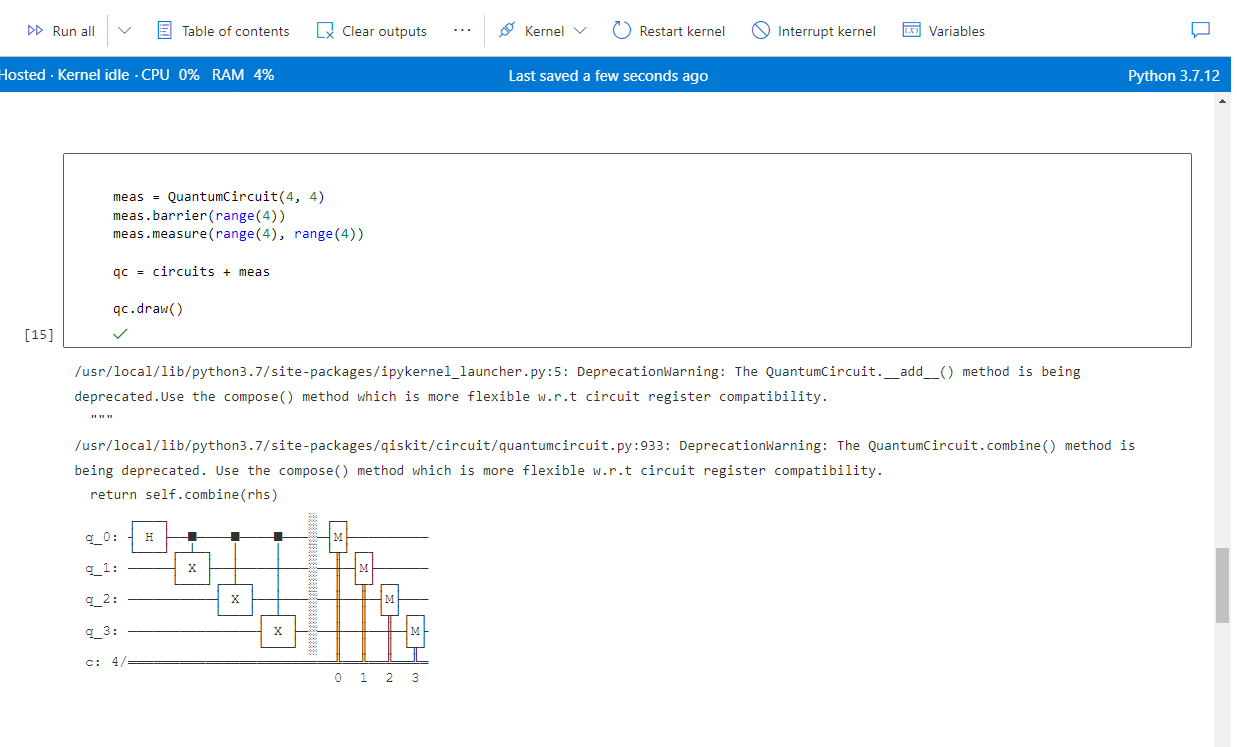
This circuit consists of 4 qubits and one classical register, and four measurements to map the outcome of the qubits.
Let’s simulate this circuit using OpenQASM backend.
Defining the object
Input:
backend_sim = Aer.get_backend('qasm_simulator')
‘COMPLETED’Let’s check the results of the job
Input:
result_sim.statusOutput:
'COMPLETED'Input:
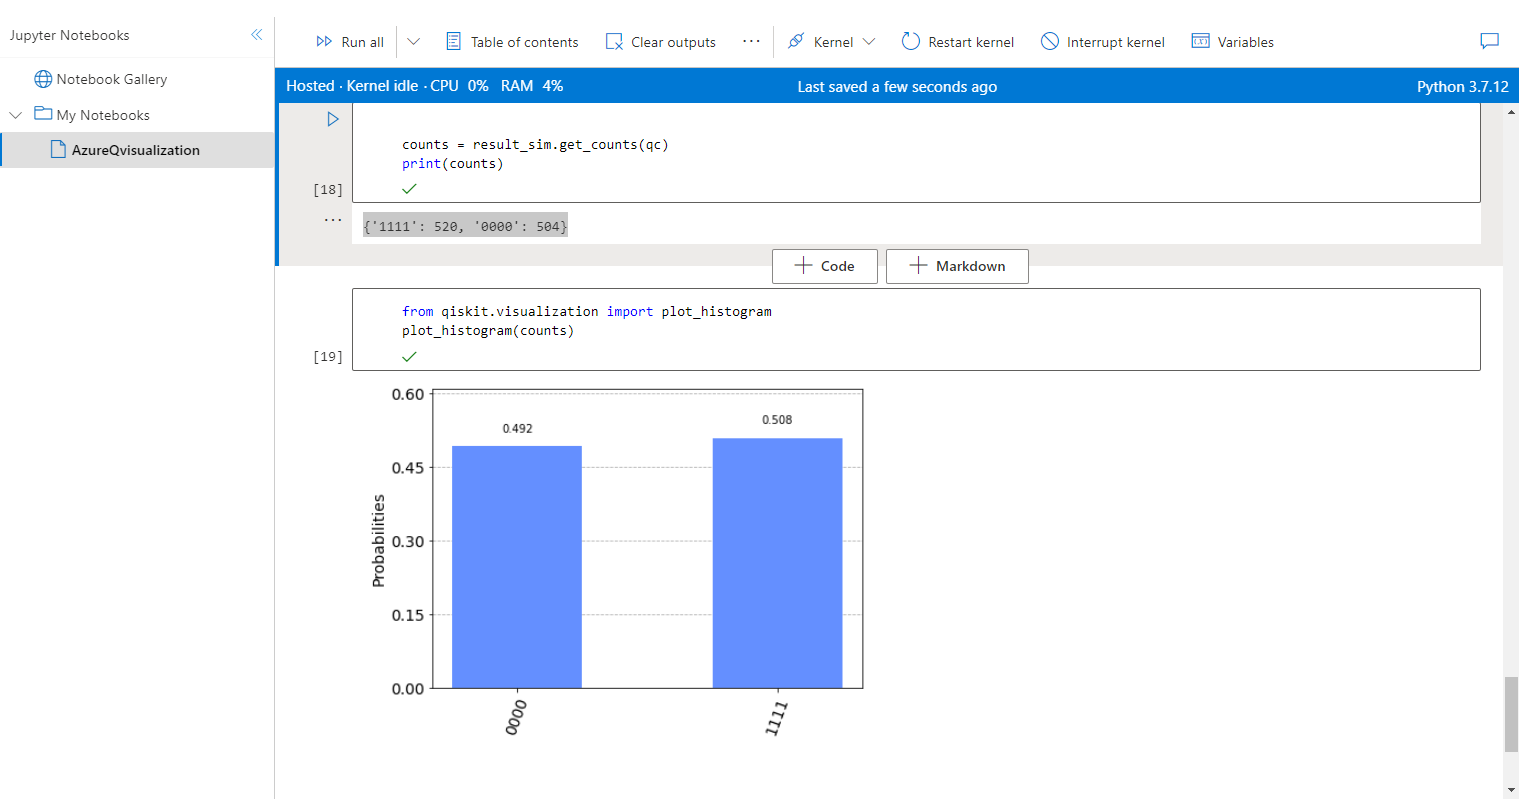
counts = result_sim.get_counts(qc)
print(counts)
Output:
{'1111': 520, '0000': 504}In the output, we have counts of all zeros and all ones, and we notice good accuracy. The output is all zero, 50 per cent of the time. We can also visualize this count in a histogram using Qiskit.
Input:
from qiskit.visualization import plot_histogram
plot_histogram(counts)
Output:
Source code: here
Images: here
Conclusion
We’ve demonstrated basic level quantum operations using the Qiskit package on Azure Quantum computing workspace. There are various applications of quantum computing like Cybersecurity, artificial intelligence, financial modelling, computational biology etc. since quantum computing provides results that normal or classical computers cannot achieve in a reasonable amount of time. Quantum computing & quantum algorithms will also have wide applications in future machine learning models.

About Encora
Fast-growing tech companies partner with Encora to outsource product development and drive growth. Contact us to learn more about our software engineering capabilities.


